How to Master Your Freestyle Swimming Technique
Chapters
- How to Swim Freestyle Faster?
- Breaking Down the Freestyle Stroke Technique
- Freestyle Swimming: The Recovery
- Freestyle Rotation: Maximize Your Power
- The Great Bilateral Breathing Pattern Controversy
- Master the Two-Beat Freestyle Kick
- Basics of Freestyle Flip Turns
- Why Freestyle Streamline is SO important?
- How to balance freestyle catch technique with pull
In this guide, you’ll learn how to master your freestyle technique through:
- How to swim freestyle faster
- Breaking down the freestyle stroke
- Freestyle swimming: the recovery
- Freestyle rotation: maximize your power
- The great bilateral breathing pattern controversy
- Master the two-beat freestyle kick
- Basics of freestyle flip -turns
- Why freestyle is so important
- How to balance freestyle catch technique with pull
How to Swim Freestyle Faster?
Aside from physical endurance and strength, technique and body mechanics are at the core of improving performance.
But what is the secret behind how to swim freestyle faster? It is often thought that to swim faster, you must increase training mileage and relative quality and intensity.
This is only partly true because, in swimming, you're only as good as your technique. Specifically, body balancing, breathing, strengthening core-stability, kicking, and knowing how and when to use the right tools to advance your swimming skills.
Here are the 5 key components to a faster freestyle swim:
1. Attention to body position.
It’s no accident this tip comes first, given it’s the most important; body position in the water is essential. In fact, the more the body sinks into the water, the greater the resistance it produces. This excessive friction compromises not only speed but also technical execution.
To improve your body position:
- First, pay attention to your head position. Too high or too low will affect how the pelvis and legs are positioned, increasing water resistance.
- Second, pay attention to your shoulders. A common mistake in freestyle is excessive shoulder rotation, which causes incorrect pull during the stroke, and an irregular kick as you attempt to balance your body.
- Last, after the hand enters the water and the subsequent arm extension, the elbow must be bent with the fingertips facing downwards to reduce shoulder resistance.
The goal is to move as much water as possible, trying to keep your hand/arm on the same line as your shoulder.
2. Train bilateral breathing.
It is important to know how to breathe bilaterally in freestyle for two reasons:
- It allows a better stroke balance. If this is neglected, freestyle swimming will be asymmetrical and, as a result, you will be technically less proficient.
- It allows for good propulsion. As mentioned above, bilateral breathing allows better balance, consequently less shoulder rotation and therefore greater propulsive thrust.
3. Enhance core stability.
Training the abdominal muscles and strengthening core stability plays a key role in swimming efficiency. The core affects more than 90% of any athlete's movements; in swimming, it supports large muscle groups that help power through the water. Core strength and stability promote muscular balance and equal distribution of force throughout the body.
Here are five swim-specific exercises to include in your activation routine to increase core strength and optimize performance in the water.
- Front Plank. Get into a prone position with only your toes and forearms on the ground. Align your body straight as a board and keep your gaze low to avoid excessive strain on the spine; hold for 30-60 seconds.
- Reverse plank or bridge. Lean your shoulders and head on the ground, looking upwards not to overload the spine, engage your core and lift your buttocks off the ground keeping your knees bent and feet flat on the ground. Focus on keeping your abdomen and lower back engaged and aligned with your pelvis. Hold the raised position for 10 seconds, repeat 5 times.
- Side plank. Place your left ankle on the ground with your right on top of it. Place your right forearm on the ground, pointing out so your elbow is directly under your shoulder and your right arm along your side. Ensure your body is aligned from shoulder to ankle, then stretch your left arm up over your head. Hold for 30 seconds and repeat on your right side.
4.Strengthen your legs.
In swimming, the role of the legs is crucial. In flutter kick, most focus solely on the down kick - when the leg goes toward the bottom of the pool. However, it is equally important to ensure a strong up kick; a strong recovery creates a second opportunity to propel the body through the water. With both the up and down kick, focus on pushing your leg through the water from the hip and ankle, being careful not to limit how much you bend your knees or let your feet come out of the water.
The correct leg movement allows for greater stability in the water, increasing propulsive capacity and speed. Fins are a great tool to help you improve both aspects of your kick. They help improve ankle flexibility and focus on the power created by the legs.
5. The right tools make the difference.
An important aspect to consider when working on swimming freestyle faster is to simulate several training aspects. To achieve this, two excellent allies to swim faster are paddles and fins.
These two tools, used individually or in combination, will develop the training stimulus at speed and allow you to swim faster during your training sessions. Here are a couple of great drills to use with this equipment:
Power Sprint (15 meters):
Put on your paddles and perform maximum sprints starting with a firm push from the wall, ending mid-pool at the 15 m point.
Speed Series (25 meters):
Put on both your paddles and fins and sprint freestyle at maximum speed, trying to breathe as little as possible.
Earlier on, we talked about the importance of body position. Beyond just the head and the body's position for the freestyle stroke's overall efficiency lies body balancing.
This next chapter reveals the importance of hips and shoulder rotation in the efficiency of the freestyle technique.
Breaking Down the Freestyle Stroke Technique
Hips and shoulders rotation in freestyle swimming have been thoroughly analyzed and for a good reason.
Here's why:
The more the body is immersed in water, the more resistance it will suffer.
Thus, the first aspect to consider in the freestyle stroke technique is learning how to work properly on body balancing in the water to reduce resistance. To do this, the work of the hips is essential. Generally, the main problem of the hips dropping comes from the wrong position of the head.
To correct the position of the hips and stabilize their core, elite swimmers perform this exercise:
- Sweep in & sweep out.
Step 1. In a vertical position, with the water at shoulder height, stretch your arms out in front of you, about 30 cm below the water level.
Step 2. With your wrist locked and palms facing outwards, move your hands in opposite directions, towards the outside, to a slightly wider extension of your shoulders.
Step 3. At this point, turn your palms inwards and move them in this direction. You have to take care of the stability of the "core," try to feel the pressure of the water on the hands, changing the angle quickly during the movement.
The second aspect to consider in mastering the freestyle stroke technique is the work of the shoulders. Elite swimmers work a lot on their body axis, accentuating the rotation of their shoulders. This is because shoulder rotation allows for a more powerful pull and an easier arm recovery.
To improve the work of the shoulders, elite swimmers perform this exercise:
- Dog paddle drill.
Step 1. Start with your arms stretched out in front and your head underwater. Very slowly, begin the freestyle stroke with a single-arm, bending the elbow and passing the hand just under the belly until the stroke ends, making the best use of the catch.
Step 2. At this point, bring your arm forward, always paying attention to the stroke angle.
Step 3.Repeat the movement with the other arm. It is recommended that the head be underwater to control the movement that is being performed and keep the body aligned.
Clearly, the position of the hips and the correct work of the shoulders depend on each other. In fact, the correct position of the hips helps the optimal work of the shoulders. Thanks to the use of the pull buoy, we can work on both of those skills simultaneously.
To develop a proper balance of the hips and shoulders, elite swimmers perform these exercises:
- Place the pull buoy between the thighs; this will improve leg buoyancy and focus more on the head and hips' position. Try to keep your gaze about 45 ° underwater, looking at the black line. In this way, you will better break the water's surface, creating less resistance, and facilitating your progress.
- Place the pull buoy between your knees and imagine keeping your torso inside an imaginary rectangle. The goal is to keep the body aligned, eliminating excessive lateral movement, and making the stroke more symmetrical. This will improve the position of the shoulders and the consequent freestyle pull.
Continue reading the third chapter, in which we deal with arm recovery in freestyle, and uncover the difference between recovery with a bent elbow and an outstretched arm.
Freestyle Swimming: The Recovery
Freestyle recovery is considered the fourth phase of the stroke; it comes after the catch, pull, and exit phases.
This phase in freestyle swimming begins when the arm comes out of the water and ends when the hand returns to the water to restart a new stroke cycle. It is called "recovery" because this point in the stroke requires neither work nor effort. In fact, the arm in its aerial phase has no role in advancing the swimmer in the water. For this reason, it is important to relax your shoulder and arm.
- An excellent exercise in learning how best to manage the recovery phase and relax the muscles involved is to finish the pool in the least number of strokes possible, focusing on the width of the stroke itself.
The classic philosophy of freestyle swimming requires that the stroke recovery is performed with a high elbow.
Here are the three steps to developing a correct recovery in freestyle.
1. Isolate the correct freestyle body mechanics using one arm at a time.
A great way to practice a smooth recovery is the single-arm drill.
- One-arm freestyle drill.
Step 1. With one hand extended in front of you, start kicking while maintaining a perfectly horizontal position and breathing sideways.
Step 2. At this point, the free arm starts a downward traction movement.
Step 3. Rotate the body, performing a full stroke. When you have completed the arm's complete extension, start the 'hinge movement,' bringing the elbow upwards in the recovery phase, passing the hand very close to the armpit.
Step 4. When the hand is in the middle of the body, bring the head forward.
Step 5. The hand must not pass in front of the face during the recovery phase.
Step 6. Repeat the exercise, alternating your arms.
2. Improve the coordinated action of the arms with timing control.
Step 3. Repeat the arms change and rotate the head to bring it forward.
3.Control of the stroke and rotation of the shoulders with the coordination of both arms.
- 6 Kicks-1 Pull
Step 1. Start the kick in the streamline position with only one arm forward.
Step 2. With a continuous and fluid movement, change the position of the arms. Take a short break when you are in full stroke extension.
Step 3. Repeat the sequence several times using proper breathing.
Over the years, traditional teaching has come up against the personal adaptation of elite swimmers' freestyle swimming. Elite swimmers are adapting their techniques to meet their own personal characteristics and needs. We are now used to seeing athletes facing the recovery phase with their elbows traditionally high and with their fingers almost caressing the water. In contrast, others tend to face recovery with a straight arm.
High elbow or straight arm? Which one is the best recovery?
Unfortunately, there is no definitive answer in determining which recovery is better. However, it is important to focus on two aspects to understand how to adapt it to your personalized needs:
The more energy you put into performing this pair of movements, the more force you will need to apply to push the body into the water. Consequently, the technique of freestyle swimming and the effectiveness of the stroke-play a fundamental role, in fact:
- High elbow recovery is characterized by the ease of execution and the possibility of being performed with little body rotation; it produces less displacement energy at high speeds.
- The recovery with a straight arm produces more displacement energy at high rhythms; consequently, it requires more force.
Closely related to recovery is the discourse related to the rotation of the body during the freestyle stroke. Don't miss the fourth chapter, in which we will deal with this topic and reveal how to improve the most common mistakes.
Freestyle Rotation: Maximize Your Power
With body rotation, the arm has a longer reach and engages more muscles, favouring greater propulsion. Keep in mind, overdoing it can easily be counter-productive.
If we consider the world's best freestylers' swimming technique, we will observe that their body rotation is about 30 degrees below the water's surface. Their stroke is much more effective when the water is taken just under the stomach rather than from the side.
The rotation involves not only the work of the shoulders but also the trunk and hips. This helps to make the stroke even more effective.
Rotation is beneficial in freestyle swimming for three important reasons:
- It allows for more water intake. By rotating on its axis, the swimmer manages to extend the stroke better, making it more effective.
- It makes recovery of the arms easier and allows the swimmer to prevent shoulder injuries more so than in the recovery with the body parallel to the water.
- It works with the strongest muscles, such as the chest, back and core muscles.
So here's how to maximize your power in the water during your freestyle stroke.
Improve the stroke's catch phase in the water.
To maximize the force in the first phase of the freestyle stroke, you will need to increase the active surface. The correct movement of the stroke in the water requires that the arm in the entry phase is completely extended. The first movement concerns the hand's tip that "takes" the water and pushes towards the bottom. The wrist must remain straight, in line with the forearm, and the elbow bent to allow the arm to take much water until the final push.
- Front scull drill.
Step1. Start in a streamline position, with your head inside the water and your arms stretched out in front of you.
Step 2. At this point, start pushing the water with your hand's palms towards the outside and then towards the inside.
Step 3. Be careful not to bend your arms. The movement to bring the water outwards must not exceed the width of your shoulders. Tip: ensure the fingers are slightly lower than your wrists.
Step 4. To facilitate drill execution, you can use a pull buoy and snorkel to stabilize your head and hips and solely focus on the skills.
Train the effectiveness of the freestyle pull.
The freestyle stroke's greater effectiveness is achieved during the pull when the arm passes just below the stomach.
To improve this phase of the freestyle stroke, you will have to try to get as much water as possible, keeping the hand/arm on the same line as your shoulder.
- Doggy paddle drill.
Step 1. Start moving your legs and start with your arms stretched out in front.
Step 2. In the first stage, bend your elbow and pass your hand just under the belly.
Step 3. Try to get as much water as possible. When the pull ends, the palm of your hand should be facing upwards.
Step 4. The rotation of the shoulders should be about 20/30 degrees.
Step5. Bring your arm forward, always paying attention to the angle of the stroke. The arm must be brought forward without performing the aerial phase.
Step 6. Keep your head underwater to keep your body as aligned as possible.
To maximize the exercise's effectiveness, you can use paddles that will allow you to have a greater water intake.
Develop an excellent exit.
Even if it is the last phase of the stroke, the freestyle stroke's push/exit plays an essential role. Without a correct push, in fact, the stroke is ineffective and makes the work of the first two phases futile.
- Catch-up freestyle drill.
Step 1. Starting with your arms stretched out in front, start the stroke with just one arm, concentrating more on the pushing phase.
Step 2. At this point, when your arm is fully extended along your side, take a slight 3 seconds pause.
Step 3. At this point, retrieve the arm, paying attention to the elbow and bending it like a 'zipper,' closing the arm again in front of you.
Step 4. For more control of the thrust, you can use the fins to balance your body during the exercise better.
Rotation and breathing go hand in hand. In fact, over-rotating and a wrong breathing technique are often the catalysts in causing a plethora of problems like scissor kicks, poor body position, cross-overs and lop-sided strokes. This next chapter reveals the importance of bilateral breathing in developing a symmetrical stroke technique.
The Great Bilateral Breathing Pattern Controversy
Another aspect to consider for swimming a fast and well-executed freestyle is breathing.
Of course, every swimmer has his own style and breathing pattern, but fully understanding the real importance of breathing could guarantee you unexpected improvements.
Here are some practical tips to understand the importance of breathing and how to manage it.
What is bilateral breathing, and why is it so important in freestyle?
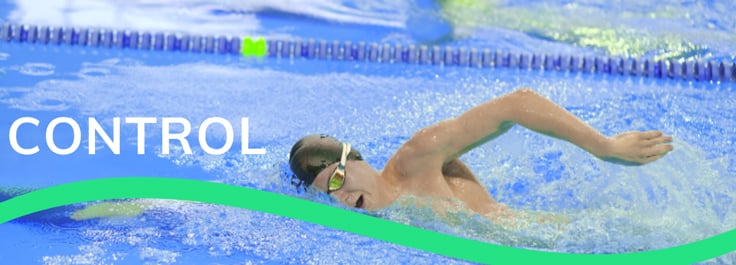
When we talk about bilateral freestyle breathing, we refer to the breathing done on both sides. This means breathing every three strokes, every five, or an odd number of strokes. Therefore, breathing bilaterally means mastering the ability to breathe from both sides of the body.
The resulting patterns are as follows:
- Left arm / right arm / left arm (breathing from the left side).
- Right arm / left arm / right arm (breathing from the right side).
Bilateral breathing should be taught at a young age because it:
- Promotes the balance of the body in the water and consequently of the freestyle stroke
- Ensures greater propulsion during the swim.
- One easy way to start practicing bilateral breathing is by incorporating breathing to your least favoured side during warm-up.
- Try to breathe both sides when doing drills and experiment with different breathing patterns. For example, doing a series of 100's breathing every 2-3-2-3, 2-3-2-5, 3-5-3-7 (i.e. 1st length breathing every 2, 2nd every 3, 3rd every 2, and 4th every 3). Don’t worry about speed initially.
- Practising bi-lateral breathing is a great opportunity to review your breathing skills. Try to breathe low in the water and avoid lifting your head or dropping your arm.
The benefits of bilateral breathing, however, do not end there. This is crucial for three other aspects.
- The balance
Bilateral breathing allows you to keep the body more balanced in the water, while unilateral breathing tends to unbalance it, especially in the inhalation phase. The benefit of bilateral breathing is greater control of the shoulder roll and greater symmetry during the pull.
- The swimming technique.
Bilateral breathing is not performed to treat the technique, but it can help improve it. In fact, it reduces the body's rotation, allowing a better entry of the hands into the water and thus producing greater propulsion during the swim.
- The rhythm.
Bilateral breathing is an excellent ally to learn how to keep the swimming rhythm. In fact, it marks the execution time of the stroke, allowing you to manage your energy better during the swim.
As in many aspects of swimming, bilateral breathing is not an absolute law.
Some swimmers prefer to breathe on the same side, for practical reasons and their swims' effectiveness. For example, swimmers with an excellent technique might decide to breathe on the same side.
Elite swimmers perform unilateral breathing to ensure that the muscles are supplied the amount of oxygen necessary to express maximum power. In fact, if we exclude the 50-meter race, which is practically all held in apnea, from 100 meters upwards, the athlete needs oxygen, and breathing every two strokes guarantees an optimal supply of oxygen.
This is not the only aspect to take into consideration. If not taught at a young age, learning how to breathe properly could be very difficult.
Not being able to get the right amount of oxygen could create an uncomfortable situation for the swimmer. That's when practicing your breathing while swimming becomes essential.
- Learn how to exhale strongly and steadily as long as your mouth remains submerged underwater. Imagine the expiratory phase of your breathing as a continuous stream of bubbles coming out of your mouth. This will help you remember not to stay in apnea.
Our advice is to learn to breathe on both sides, for a matter of technique and balance.
It is also essential that open-water swimmers and triathletes get used to training while breathing on both sides. In fact, there are references during the race, both to the right and the left, and learning to use them becomes fundamental.
Read our next chapter to learn how to master the freestyle kick to develop stability, and improve body position and propulsion, all necessary for a more efficient freestyle.
Master the Two-Beat Freestyle Kick
Two, four, or six? Which freestyle kick pattern will best fit your needs?
Swimming is also a question of numbers. In this case, we are talking about the number of kicks for each stroke performed in freestyle. Each swimmer has his own style, but in this chapter, you will understand that to break your 100 meters or 1500 meters personal best, the freestyle kick is different for each one.
Here's what you need to know about freestyle leg movement and how to improve it to beat any of your records.
Let's start with a premise. Leg work is often not the swimmers' favourite.
This happens because kicking requires much attention; it is essential to perform the correct movement. Secondly, it is a job that requires much effort and can be tiring.
Why is freestyle kicking so important?
Because learning to take advantage of propulsion that starts from the feet and ends up in the arms is an element that can complete your freestyle effectively and favour a fast and effective swim. Besides, the legs allow greater stability in the water, increase the swimmer's propulsive capacity, and are essential in maintaining rhythm, especially in longer races.
To build a correct kick, it is essential to take into consideration some aspects:
- The width of the kick should not be too wide.
- During the drills, focus on the kick and stroke.
- Repeat the drills slowly and with control to acquire the correct technique.
A good way to start working on your legs is with sets of 25's, 50's or 75's with 10-15 seconds rest on the wall, allowing you to work on the correct two beat-kick without the hassle of time.
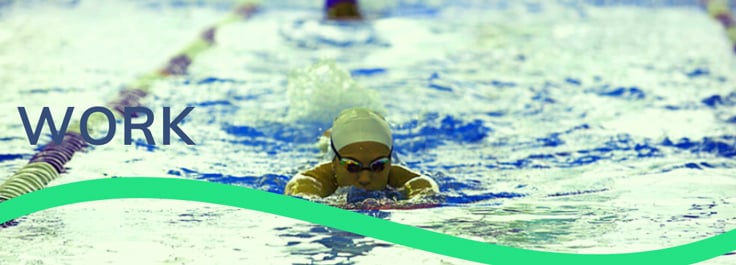
In fact, the two beat-kick provides for a coordinated kick for each stroke cycle.
- Work in a series of 10 x 25 meters with 10" rest where the goal will be to maintain a continuous and efficient double-stroke kick for the entire work duration. If you are particularly weak on this fundamental, the use of fins is recommended as well as necessary.
A fast and efficient swim is based, in fact, also on the coordination between the number of kicks and strokes, and even if this seems easy to do, it is actually not at all.
- Improve the coordination between legs and arms and the effectiveness of the kick/stroke ratio.
These drills involve swimming 50 meters four times with different kick patterns:
- The first using only the arms without a kick and the aid of the pull-buoy.
- The second, doing a single leg kick every two strokes.
- The third, doing two kicks each stroke, for example, when your hand enters the water and the other during the pull.
- The fourth by doing three-kicks of each stroke, then six kicks per stroke cycle.
Does the contribution of the legs have the same importance for sprinters as for long-distance swimmers?
The answer is that for both swimmers, the legs play a fundamental role but with different objectives.
- Distance or open water swimmers. You can see that most of these swimmers adopt the tactic of double kicking every stroke cycle. This allows effective propulsion for the type of effort produced and allows the right swimming rhythm to be maintained.
It must be said that double kicking every stroke cycle is not the only possible option. Many swimmers, especially the more experienced and well trained, tend to use four or six kicks every stroke cycle.
- Mid-Distance. In modern swimming, these swimmers combine sprinter characteristics with excellent aerobic abilities. In their swim, they perform four kicks every stroke cycle. This allows the body to remain more aligned with the hips and shoulders and, therefore, more lifted over the water.
- Sprinters. The swimmers must lift their body on the water to the extreme to have less friction and ensure greater propulsion during the swim. This is why their freestyle is characterized by six kicks every two strokes. It is not easy for all sprinters to put this coordination into practice, and certainly, this type of propulsion allows for faster advancement and higher energy expenditure.
Another crucial part of an efficient and fast swim to examine is the execution of the freestyle flip-turn. Don't miss our next chapter, where we breakdown the steps of an effective and fast freestyle turn.
Basics of Freestyle Flip Turns
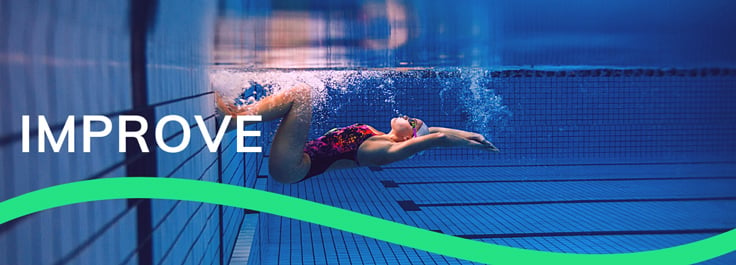
In absolute terms, a well-executed flip turn can earn you up to a second each lap.
Of course, the best is more marginal when it comes to elite swimmers. And yet, to improve your times in practice and, consequently, in meets, you cannot leave out training and refining the freestyle flip turn.
Whether you are a sprinter or a mid-distance swimmer, flip turn plays a key role in freestyle swimming, so here are some key elements you need to consider to improve the freestyle flip turn.
The flip turn is the third element that has a decisive influence on performance.
If the freestyle flip-turn is executed correctly, it will speed up a swimmer and allow for a brief respite from swimming, thus explaining why short-course times are faster than long-course times for the same events.
There are three most common mistakes made by swimmers when performing freestyle flip turns:
- The swimmer approaching the wall blocks his legs, raises his shoulders to give himself the momentum, and executes the rotation. This error breaks the continuity of action of the swim and above all, it slows down both at the input and during the rotation itself;
- Knees too far from the chest, and this makes the "somersault" slower, slowing down the swimmer who takes longer to reach the wall;
- The swimmer finds himself with his arms bent when his feet reach the wall on the exit phase. This results in a delay in repositioning with the arms in a streamline and, therefore, an incorrect body position when exiting the wall.
To improve the freestyle turn, first, you have to focus on its correct execution, here's how:
- In the approach to the wall, the head must follow the hand. The head must start moving within the flip turn curve while performing the last push with the stroke.
- Raise your hips. Dip your forehead, push your shoulders downwards and push your hips upwards, bending strongly.
- Lower your head underwater. At the end of the last stroke, immediately rotate your palms down, lower your head and push it under the water to facilitate body rotation.
- Keep your knees on the surface. The biggest mistake is keeping the heels on the surface and drawing the knees too quickly, creating enormous resistance.
- Push off the wall. The pushing technique is the same as jumping out of the water. Feet at hip height, upper body locked, and leg thrust to shoulders.
Once you understand the steps of an effective flip-turn, you can certainly start practising incorporating speed into your turn. Here's how to do it:
Increase speed during your approach. This is the first aspect to take care of to improve the flip turn. To perform a faster turn, try to keep an effective kick up to the wall. The faster the entry, the faster the rotation will be, favouring a more explosive underwater phase. When you are close to the wall, and you're missing a stroke, lower your head and shoulders firmly and quickly bring your legs towards it.
- Turn Drill.
Take care of the rotation speed. This is the second aspect to take care of during the flip turn. To prevent the rotation movement from being too slow, check the position of the head during rotation. To improve this aspect, the first thing to do is to keep the chin very close to the chest and throw your shoulders forward to improve the rotation speed.
- Static wall- turn drill.
Maintain a streamline position.
The third aspect of the turn concerns the position of the body immediately after the push. Your arms should be stretched out in front of your head, closed at the ends by your hands joined together. The head stuck between the shoulders, with the look at 45 degrees, and the core and buttocks' muscles perfectly in control to form a straight line to reduce frontal resistance and increase speed under the surface of the water.
- Static wall- turn drill with streamline.
Step 1. Attach your hands to the wall and perform ten seconds of strong legs.
Step 2. At this point, make the turn and push yourself correctly from the wall so that your body slides into the water in the streamline position.
Step 3. After the push, you will no longer have to move a muscle to learn how to manage your body as you exit the dive.
Why Freestyle Streamline is SO important?
Often to improve you have to go back to the basics.
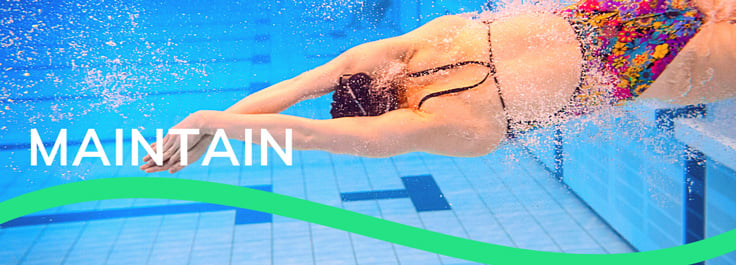
In swimming this translates into returning to the simplest but most important skill, the streamline. Streamline is the most hydrodynamic position a swimmer can be in and it clocks in some of the swimmer’s HIGHEST speeds.
In fact, the two highest speeds in a race are off the start and the turn(s). The streamline helps carry that high speed for as LONG as possible.
Here are some useful tips to improve your streamline position to add the last piece (or the first!) to your preparation in view for achieving your personal goals.
Efficiency and optimization of the technical skills.
Being able to go further, faster, and with less effort is the goal of any swimmer. Knowing how to master the ability to streamline is essential to your overall swimming performance.
Here's a drill to practice performing a correct streamline:Step 1.Sink in and push from the wall while blocking one hand over the other by hooking the thumb of the upper hand on the lower one.
Step 2.Push and rotate on your stomach. Keep your head firmly wedged between your shoulders and stretch your arms out in front of you as far as possible.
Step 3. Check that your gaze is downward and that your core, hips and legs are perfectly aligned.
Step 4.Hold the position and slide until the body reaches the surface.
There are two streamline positions to consider:
1) Elbows tight behind ears.
2) Elbows tight in front of ears.
The biggest difference between the two is the head position. The head position plays a very important role in the overall efficiency of the streamline.
Note that when deciding which one works best for you, you must consider how you rank in terms of strength, mobility, and flexibility.
A swimmer with poor upper body mobility, for example, will have a hard time performing the behind the ear streamline position. The most common mistake would be an excessive lumbar flexion (back arch).
The swimmer must assume the straight line position while swimming too. Feet, legs, spine, back and especially neck must be on the same axis.
How is the streamline translated into the freestyle swim?
1. In freestyle in particular it is important that the swim is fluid and balanced. When the head is in alignment with the body and the spine is straighter, the least frontal drag is encountered.
Note it is important not to raise the head during the breathing phase, but to rotate it as much as possible.
2. For the freestyle turn, maintain an effective kick to the wall approach, in order to have a correct entry speed. Perform an effective rotation, bringing the chin towards the chest, bending at the waist and pushing the shoulders towards the bottom.
Once the rotation has taken place, it will be important to have an optimal streamline position to perform a correct and fast push off and carry the speed for as long as possible.
3. Lastly, let's examine the role of the streamline during the start. The dive is intended to be one that creates as little water resistance on entry as possible. The main focus of the swimmer is to balance speed through the water and an ability to seamlessly begin the stroke.
- The arms, head and body are aligned during entry to attain a streamlined shape.
- The head is perfectly aligned with the arms and is in a neutral position.
- The swimmer must keep the head down and arms down, while following the whole body through water where the head and arms went.
- As the upper body enters the water, the hips continue to extend to align the legs with the trunk.
Starts , as mentioned above, are one of the two fastest points in a swimming race and for this reason it is paramount to train and continously refine.
To understand the importance of streamline it is enough to think that in a short course, respecting the imposed limit of 15 meters, a swimmer could swim up to 60% of a race under the surface of the water.
Our advice is to dedicate a part of your daily training to streamline and diving exercises.
To correct mistakes in freestyle, recognize your mistakes and work on them. One great way to balance freestyle catch is with pull, read our last chapter to learn how. Improvements will come with time and constancy in work.
How to balance freestyle catch technique with pull
Practice makes perfect.
It is no secret that freestyle is the most preferred stroke because it is perceived as the least difficult to learn and practice; however, it also has certain technical aspects that need to be broken down and improved individually.
Here are the definitive tips for developing and improving your stroke technique and completing your freestyle learning path.
Freestyle technique can be broken into four different phases:
- Hand entry.
First of all, the fingers' correct position to pull water is to keep them slightly apart. This is because the hand must be relaxed in the water, in a 'natural' position.
- Before entering the water, the hand must keep the straight line projected from the shoulder without expanding outside the body.
- Turn the palm about 45 degrees outwards to immerse the thumb before the rest of the hand.
- The hand should be placed slightly down, and the elbow held high.
2. The catch phase.
To optimize the strength of this phase, you will need to increase the active surface. The stroke's correct movement requires that the arm during the catch phase is completely extended and stretched in the water.
- The first movement concerns the hand's tip that "takes" the water and pushes towards the back. The wrist should remain straight, in line with the forearm, and the elbow bent to allow the arm to take much water.
- The hand is pushing water by bringing the rotation of the arm downwards and slightly outwards, with separate fingers, until reaching the final thrust.
The one-arm freestyle technique allows you to improve these first two phases:
3. The pull phase.
We are talking about the stroke phase that allows you to advance through the water. In the first phase, when the arm goes 'to take' the water, you will have to take advantage of the rotation of the shoulders, which, as we have already seen, is about 30 degrees below the surface of the water.
- Maintain the correct body position. The hand and arm must remain under the body and not to the side. Try to get as much water as possible with your forearm.
It is with the pull that the real advance in the water comes.
- The hand must push the water back.
- The arm rotating from the outside slightly towards the inside of the body, and the elbow bent at 90 degrees.
- The hand pushes the water until the end of the arm's stretch in the water, touching the hip before the exit.
- When the traction is over, the palm must be facing upwards.
- The starting point is the perfect floating and balanced body, with high hips and a steady head.
- The arms in opposition, one along the body and the other lying over the head.
- Start the pull phase by bringing the arm's hand extended up into the water, rotating it with the palm outwards so that the little finger is the first part of the hand to slice through the water.
- Push the water down and out, starting the pulling phase. The elbow should remain high, and the pushing should be done from the forearm to the hand.
- At the end of the stroke, push your hand back quickly, try to move as much water as possible, lastly, bring your arm out of the water to start the recovery.
This phase begins when the arm comes out of the water and ends when the hand comes back into the water to re-start a new stroke cycle.
- This movement must also facilitate the roll phase that is produced with the body.
- During this phase, breathing takes place, and the body assumes the maximum rotation around its axis.
- The use of a snorkel is beneficial as it facilitates a correct movement of the arms during recovery.
- Put on the snorkel and start with your arms extended in front.
- Start the stroke with one arm, paying close attention to the pulling and pushing phases. When the stroke reaches the exit phase, the palm of your hand must be facing upwards.
- In the stroke's final push phase, the arm pushes backward until it comes out of the water.
- The snorkel will allow you to control the position of the head better.
- When your arm is fully extended along the side, work on the recovery and pay attention to the high elbow; close your stroke again in front of you.
Mastering your freestyle swimming technique requires specificity and great attention to detail. Breaking down the freestyle technique to identify areas of improvement is key. It's important to remember that there is no one size fits all solution for the specific components of an efficient freestyle technique.
In competitive swimming, tenths, even hundredths, of a second matter.

When success is measured in milliseconds, the key to improvement is incremental changes, which require consistent quality training.
Doing the right work, in the right quantity and intensity, and at the right time, is the fastest way to improve. But how do you measure that?
Understanding good training is hard.
What skills did I do well today, and what do I need to work on? How hard did I train today? Was it too much or not enough? To answer this we need to understand that each athlete is unique and requires personalized feedback.
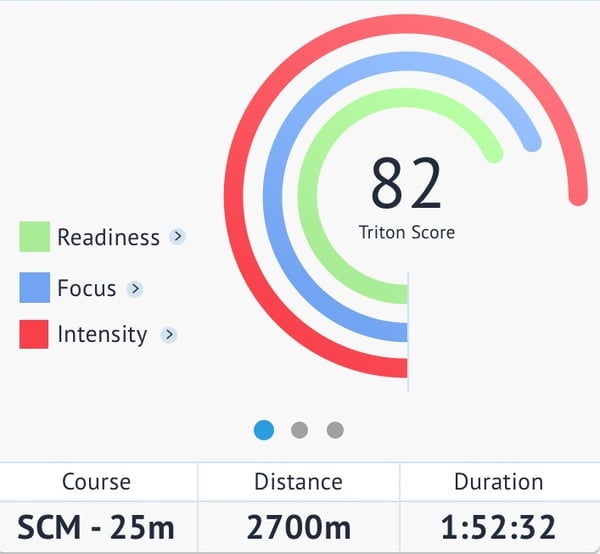
Triton Score ranks performance in 3 key areas for each workout.
Readiness (stay healthy) + Focus (perfect skills) + Intensity (train hard)
Improving is an iterative process, so we developed FIT - Focused Iterative Training to help you improve your training in 3 simple steps.
Step 1: Observe
Track swimming using TritonWear and rate your effort. Then get to know your Triton Score and how it fluctuates daily.
Step 2: Discover
Review your Focus, Readiness and Intensity scores to find out how you’re performing in each area, and see your personalized recommendations.
Step 3: Adjust
Use our recommendations to set SMART goals and adjust how you train. Test and iterate on skills until you achieve your goals. Then start over!


